Showing posts with label Cricut. Show all posts

Sunday, December 30, 2012

Christmas Cottage Magic Gift Card Holder

and another tutorial!

Hey all you bloggers out there!  Get a head start on next year's Christmas projects with this tutorial!

Using cream 'my favorite memory' journal card with red lace border, brown 'the magic of the season' phrase and red/white 'Merry Christmas' tag from the die-cut sheet.  Suggested ink: Festive Berries, Vintage Photo, Antique Linen

Doily: Spray with glimmer mist/ink with Antique Linen.  Dry and cut into 4 pieces
Flower:  Cover a1-1/2'' circle with double stick tape.  Have some glue dots handy.  Alternatively, add 1/4" wonder tape to the 12" strip of pleated ribbon.  Remove tape liner.  Using 12" piece of pleated red satin ribbon, begin adhering at the outside edge of the circle, working toward the center, adding glue dots if needed.  Glue dot a large pearl in the center.

Card Base:

  • Using the 5-1/2 x 12'' white snowflakes/red damask: score at 4'', 6'' amd 8''.  
  • Fold mountain, valley, mountain, leaving a 2'' center section.
  • Open card flat.  Mark the center line 1.5'' from each of the top and bottom edges.  Cut a slit between the two marks.  Erase the pencil marks.
  • Re-fold the card so that the center flap faces the inside front of the card.  
  • Turn over the card to the back side.  Add strong adhesive to the back short edges of the flap and near the center fold to form the pocket. 
  • Turn the card over again; then add adhesive only to the top and bottom of the LEFT SIDE of the short flap and adhere to inside front of the card.
Front:
  • Wrap 22'' of twine around journal card and tie into a bow, just below the title.  Trim ends.
  • Foam tape 'the magic of the season" phrase over the words 'my favorite memory.'
  • adhere 2 doily pieces to the back of the top and bottom of the journal card.  Attach to the card front using foam tape.
  • Glue ribbon flower onto journal card.
Inside:
  • Add red snowflake matting piece 1-3/4 x 5-1/4'' to the gift card flap
  • Ink snowflakes and adhere to make 3 two-layered pieces ( Cut from Cricut Tie the Knot at 1-1/2'')
  • Foam tape Merry Christmas ticket onto red snowflake ticket.  Wrap and knot 11'' of twine around the piece
  • Add 2 remaining doily pieces to the back, top and bottom of the red snowflake ticket piece.  Adhere piece to right side.
  • Add foam tape to the backs of the snowflakes.  Place one at the bottom right corner of the ticket piece.  Place the other two on the gift card flap.
I hope you enjoyed all the card tutorials this season.  Have a Happy New Year, everyone!

Be Inspired!  
Jules

Friday, December 28, 2012

Carta Bella Winter Fun!

Hello sweet blog friends!  This is my second post today!
Design team projects from The Scrapbooking Studio will be shared!  This is a LONG post, so get your favorite blogging drink and enjoy!

First up, a card:  The card front was embossed with Tim Holtz snowflake embossing folder, then sanded with a sanding grip and inked with Faded Jeans Distress Ink.  For the focal, a large image from Just Rite Clear Christmas Vintage Labels One was stamped onto kraft card stock with Coffee Archival Ink, then embossed with clear embossing powder.  The image was then cut and dry embossed with Spellbinders Vintage Label and Banner dies.  A fancy tag was cut with a Spellbinders Fancy Tags Two die and red cardstock and layered onto the craft label.  The sticker from the sticker sheet was layered onto another die cut piece.

The pleated ribbon brings a nice pop of red to the card, layered with stickers to cover the stitching.  A flower was made from more pleated ribbon and topped with a Teresa Collins jewel.


The card is an easel.  To hold it up, an embellished Maya Road snowflake was glued to the inside.


A close-up of the snowflake.  To achieve this look, the naked chipboard was covered with embossing ink and sprinkled with snowflake tinsel embossing powder and heated.  When cool, the piece was covered with glue and blue glitter.  A Teresa Collins jewel covered the center.


Layouts

 The title "SNOW" and a large snowflake were cut on the Cricut.  The hexagon shapes are Maya Road Chipboard covered  with paper from the line and letter stickers.  Border stickers from the sticker sheet were used on the top and bottom of the title mat.  

For the coordinating page,  the negative of the snowflake was glued to another patterned paper from  the line.  The snow man was cut on the Cricut - love that he has a red heart!  A layered journaling piece and a Maya Road snowflake, embossed with snowflake tinsel embossing powder and topped with a Teresa Collins jewel.  See close-ups below.


My altered project this month was made with one sheet of 12 x 12 paper for the base, folded and cut to form a book.  The first page was punched with a Mini-8  Vine punch to make the shaped edge.  Rayon ribbon was colored with Faded Jeans Distress Stain, crumpled into a ball to dry and then tied onto the project in a double bow.


 This page corner was also punched with the Mini 8 Vine punch.


Thanks for peeking at The Scrapbooking Studio December projects!  All supplies used may be purchased as the Studio, so come get yours today!!

Be Inspired!  

Jules


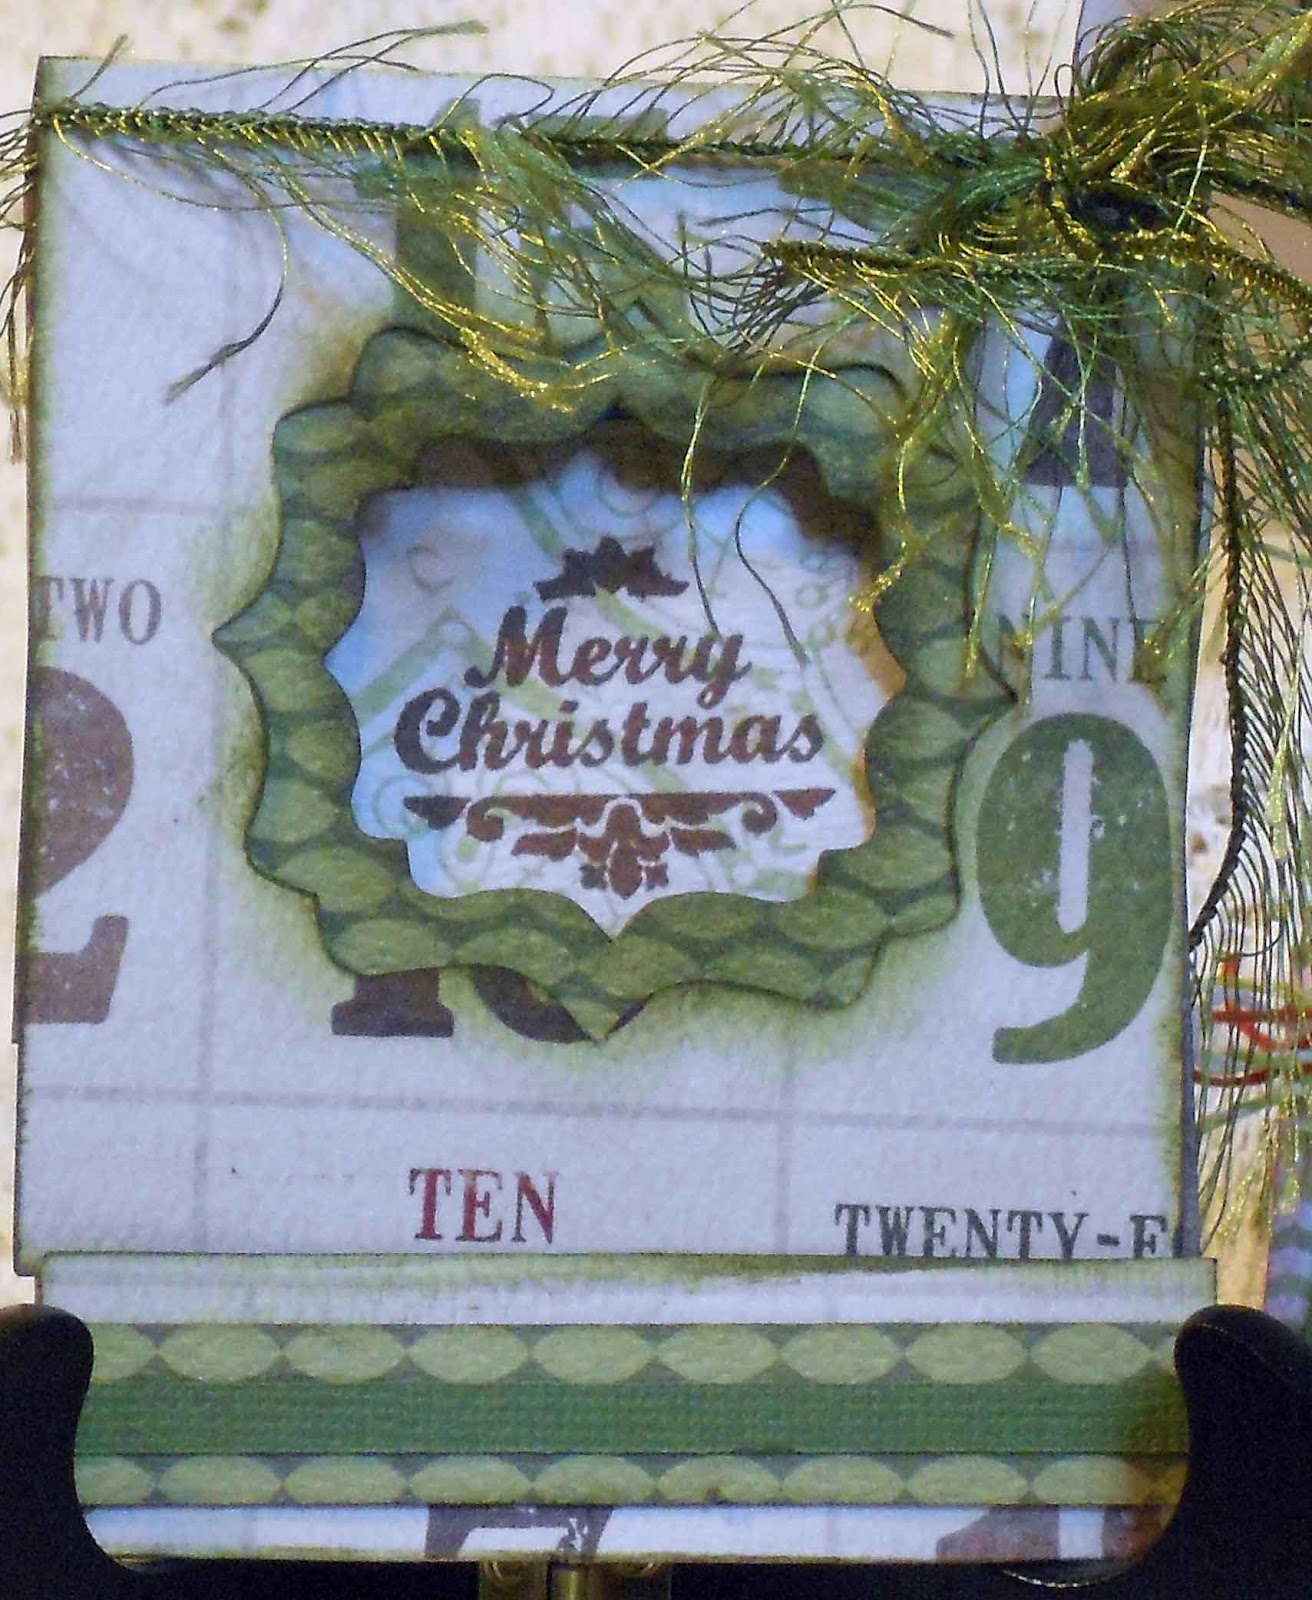
Christmas Cottage Matchbook Cash Card Tutorial


Christmas Cottage Matchbook Cash Card

Ink Suggestions: Forest Moss, Vintage Photo, Coffee Archival


Base: Score and fold into matchbook.  Staple the center of the narrow flap approximately 1/4'' from the fold.

On the inside, line up the green piece with the bracket square cut-out and adhere so that it is evenly spaced on the card front.
  • Cut down and assemble pocket and adhere with the opening facing right.  
  • Add green strips to pocket and inside front
  • Stamp Merry Christmas with Coffee Archival, so that it is centered inside the 'window'
  • Layer green strip over green printed strip and adhere to 'strike plate'
  • Wrap 18" green eyelash fiber and tie into a bow at the top right edge of the card.
This can be adapted for any occasion.  
products used:
Teresa Collins Christmas Cottage from TSS
Just Rite Stamps -Christmas Vintage Labels One from The Scrapbooking Studio
Tim Holts Alterations Die - Matchbooks
Green Card stock
Forest Moss Distress Ink
Gypsy design tool
Cricut Cart TBBM -tag pocket/blackout 3.06 w  x 6.29 t
Cricut Expression

Happy Crafting!  Be Inspired!

Jules

Wednesday, November 28, 2012

Christmas Cottage Countdown Gift Card

Hello Bloggers!  Sharing a little card today.  Teresa Collins' Christmas Cottage Paper Pack was used for this card as well as Spellbinders Spiral Rose die and Cricut (pocket and bracket mats).

Ink : Vintage Photo 

Using 'Christmas Countdown' rectangle, green journaling ticket, green "December", Calendar and 'A Merry Little Christmas' rectangle from the die-cut sheet


Enjoy and Be Inspired!

Jules


Monday, November 19, 2012

Crate Paper Acorn Avenue Layouts

Hello bloggers!  Up today on the blog are layouts made for my DT gig at The Scrapbooking Studio in Bloomington, IL.

Acorn Avenue, by the title appears to be a fall paper line, but it truly is not!  There may be one side of one of the papers that is fall themed, but the remainder is very random and could be used for just about everything!

For the first LO, I went with a fall theme, due to the great fall photo I had to work with! Stitched squares, red frame, gold matting and title were also cut with the Cricut.  The gold frame was a little much for the layout, so it was stamped with Tim Holtz stamps (fabulous flourishes, curiosities and haberdashery) to tone it down a bit.
 The title has hidden journaling attached to it and tucks into a pocket at the top of the frame.
 Embellishing the layout are Prima bling, paper flowers cut from the patterned paper, and an edge punched strip.


A little more detail on the stamping.  The red mat is also stamped, but the camera did not pick it up well.


OK. Next LO ~ Don't laugh......I mean it!


 The paper used to cut the squares on the first LO was used as the background for this page.

The picures used for this LO have been stashed in a photo box for many years and this paper line was just what they needed!
 Each little square was layered up with patterned paper and topped with a title letter.  The leftover space received a chipboard squirrel!
the right side of the LO has layers of patterned paper and border stickers, along with some random chipboard circles, journaling sticker and paper flower, all from the Acorn Avenue line.

Stop by the Studio to get your Crate Paper supplies today....

and.........Be Randomly Inspired!

Jules

Sunday, September 23, 2012

Wedding Table Decor...

...Done  with a week to spare!  Looks like a bunch of tents stacked on top of each other, huh?


Okay, this is what they really look like.....twenty-five table numbers and two each of the cupcake flavors ~ Wedding Cake and Peanut Butter Cups ~ YUM!


Close up of the table numbers...


Close up of the cupcake flavors...


They needed a little bling from Recollections and Martha Stewart.

To make these the Tie the Knot Cartridge, Cricut Expression and Gypsy were used.  First, the numbers and their shadows were laid out on four mats on the Gypsy.  After figuring out the sizes for the mats under the numbers, a shape was found and altered to the exact size needed by unlinking the aspect ratio.  The same was done with a card shape for the "tents."  Glue it all up and bring on the bling!

The font used for the cupcake flavors is CK Renaissance.  This project really did not take all that long to set up...maybe 1-1/2 hours total; then two hours or so gluing everything together.

All the colored card stock was inked with Distress Inks in Dusty Concord, Shaded Lilac, Barn Door, Mustard Seed, Rusty Hinge, Peeled Paint, Pine Needles and Forest Moss.

This is the newest version of the Cricut Expression:


Friday, August 31, 2012

Octagon Origami Box & a Tutorial!

Hello fab bloggers!  Here is a challenge for you today and a really, really long, picture-filled post!  Last weekend, at Quick Quotes Private Reserve in St. Louis, there was a make-and-take to create this box.  I did not participate in the project, but loved the results.

Being the curious one that I am, I searched the internet for a box that looked similar to the ones created in St. Louis.  This is the video link I watched to create this box!  Click here.  There is no audio instruction, but it was enough to get it with a little practice!

This is the finished box. 

To take this challenge, you will need 16 squares of paper, exactly the same size.  I used origami papers for this project. These are 6 x6.  Follow these steps for all sixteen squares.

 Start by folding diagonally, both ways, then vertically and horizontally, creasing each fold well before going to the next fold.

Next, fold 3 corners into the center. Unfold the left fold and flip over.


It should now look like this.

 The paper is turned so that the point that was unfolded is at the top of the photo (left).  Bring the bottom point up to the horizontal score line.  The photo to the right is the same as the left photo only the point is now facing left.  The right side should now be folded toward the left point up to the next score line (about an inch) and then unfolded.

Ready for the next fold. Grab the top outside edge and line it up with the diagonal white edge next to it.
 see how it lines up?  Crease well.
 Now it looks like this.
 Bottom edge now is folded up to meet the top edge.  The crease should be at the left point across to the center right.
 Now it looks like this.
The bottom white edge is now folded upward to line up with the diagonal orange edge.
It should now look like this.
Hopefully, between watching the video and looking at the still photos, this will be clear.  The next step is opening the piece.  From the top edge, pull the paper toward you.
 When it is opened, it looks like this, kind of a pie wedge with a funky tail...
 In this photo, I unfolded the center.  The long skinny triangle part seen just to the right of the longest crease may be glued at this point.  Use dry adhesive.  Fold it back again to look like photo above.
 After you make 15 more of these, it does get easier!  Promise!  Now you are ready to assemble.  Eight pieces are needed for the top and eight for the bottom.  It is probably a good idea to assemble without adhesive first.  Once you see what the finished project will look like, then go in with adhesive.  Adhesive was placed on the left of each piece.
 Pull back the flap on the right side of one piece and insert the left side of the second piece, all the way to the next fold.
 It should look like this.  Continue adding pieces until you have eight assembled.  The eighth one is inserted both to the left and to the right.
 The inside should look like the next two photos.
Now, do the same assembly for the bottom of the box.

When it is flipped over, it looks like the photo below on the outside.

Here it is all embellied.  I added octagonal pieces of white chipboard cut on the Cricut with George and Basic Shapes at 5.75" (not pictured)

The harvest scene is a Dazzle Sticker from Paper Wishes Happy Harvest Stickers, mounted on kraft resist cardstock, colored with Smooch Ink, matted with dark brown, then pearlized green cardstock.  Vintage Photo Distress Ink was  blended on the edges.

 A triple loop satin bow was made with Becca's Peg Bow Maker and a button was added onto the "wheel"  of the wheelbarrow.


 This is another box I made, using 2" squares of 7gypsies "Trousseau" paper and pink string pearls from The Scrapbooking Studio.  Even the flower and the bow were made from the paper!  This teeny little box would be great to hold a pair of earrings or a piece of chocolate...hmmm, which do I like better?


Anyway, sorry for the long post, but I just had to share that I could make this work, and you can, too!

Until next time, BE Inspired!  Jules