Showing posts with label Christmas. Show all posts

Friday, December 28, 2012

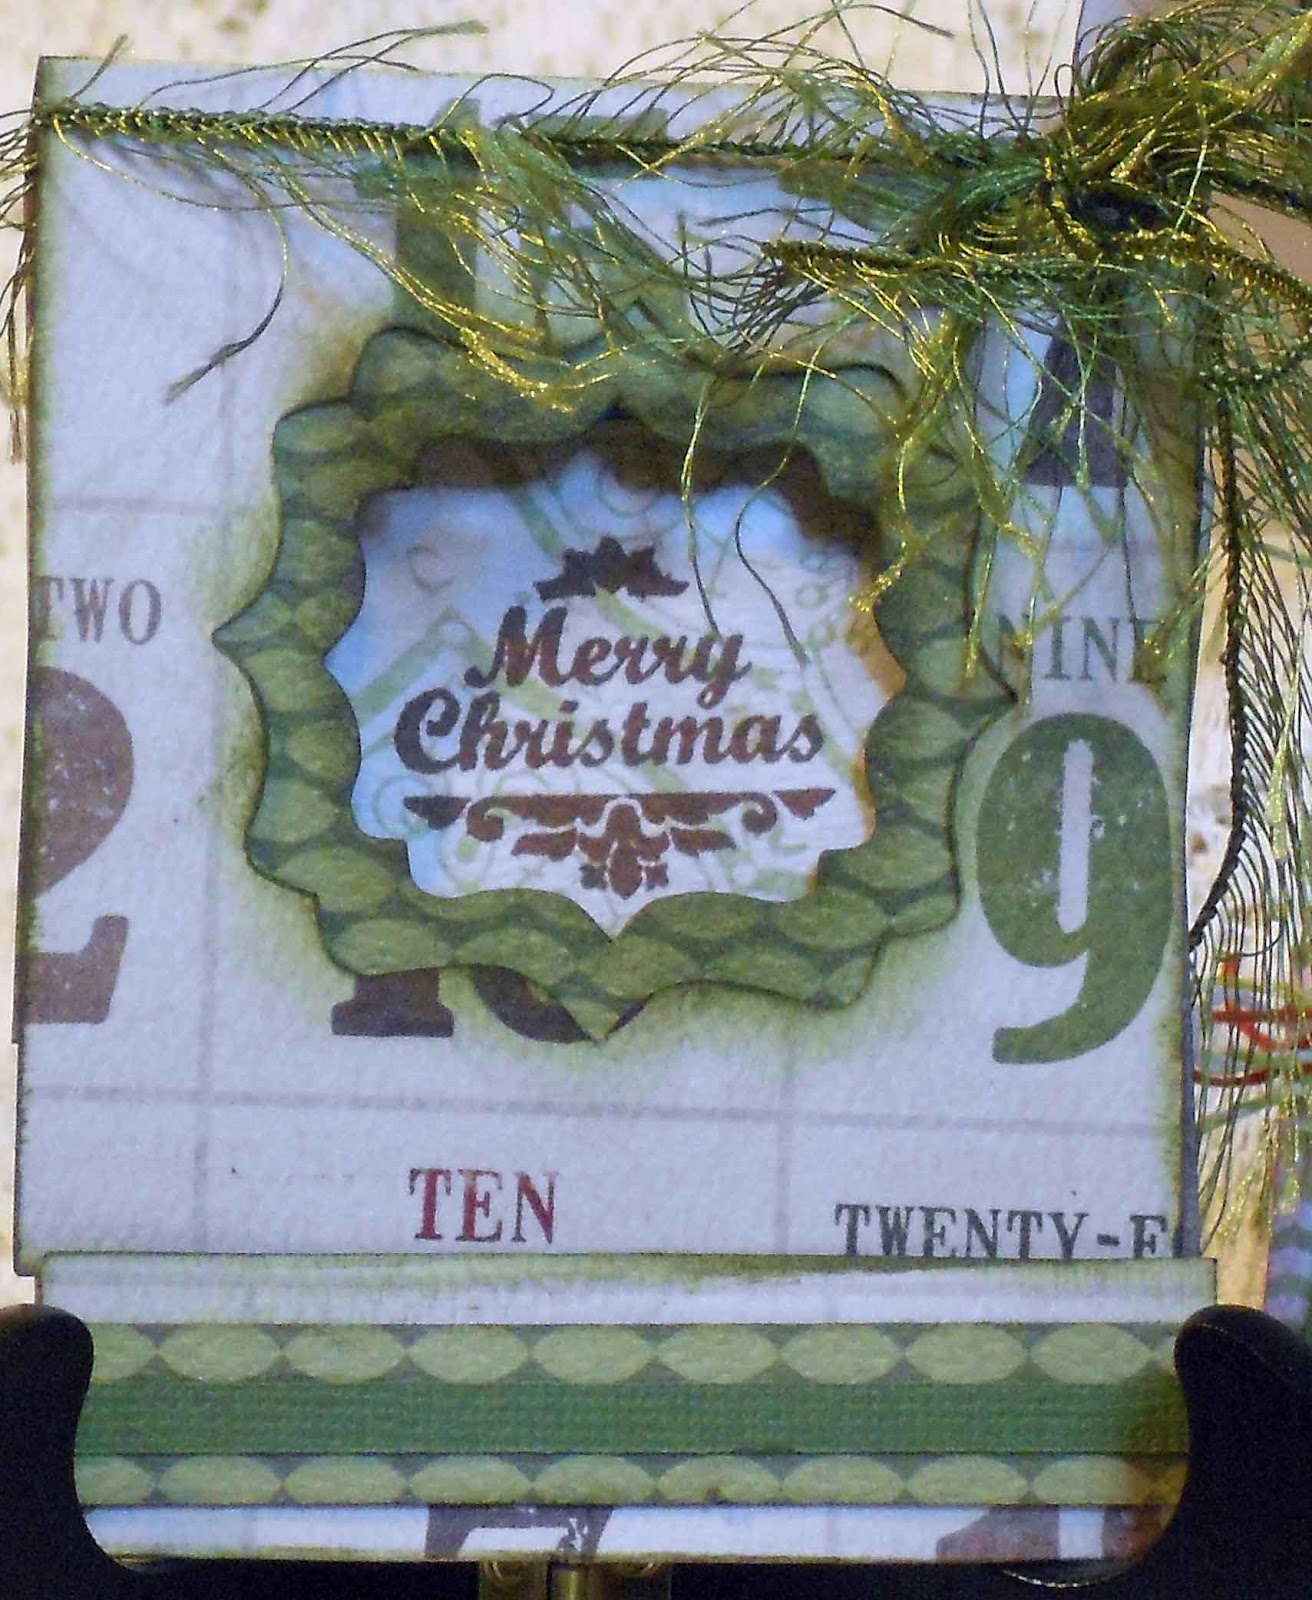
Christmas Cottage Matchbook Cash Card Tutorial


Christmas Cottage Matchbook Cash Card

Ink Suggestions: Forest Moss, Vintage Photo, Coffee Archival


Base: Score and fold into matchbook.  Staple the center of the narrow flap approximately 1/4'' from the fold.

On the inside, line up the green piece with the bracket square cut-out and adhere so that it is evenly spaced on the card front.
  • Cut down and assemble pocket and adhere with the opening facing right.  
  • Add green strips to pocket and inside front
  • Stamp Merry Christmas with Coffee Archival, so that it is centered inside the 'window'
  • Layer green strip over green printed strip and adhere to 'strike plate'
  • Wrap 18" green eyelash fiber and tie into a bow at the top right edge of the card.
This can be adapted for any occasion.  
products used:
Teresa Collins Christmas Cottage from TSS
Just Rite Stamps -Christmas Vintage Labels One from The Scrapbooking Studio
Tim Holts Alterations Die - Matchbooks
Green Card stock
Forest Moss Distress Ink
Gypsy design tool
Cricut Cart TBBM -tag pocket/blackout 3.06 w  x 6.29 t
Cricut Expression

Happy Crafting!  Be Inspired!

Jules

Tuesday, December 11, 2012

Quick Quotes Christmas Cards


Hey fabulous bloggers!  Quick Quotes had (past tense, sorry!) this Holiday & Events Card Kit last year and I made all the cards and failed to share!  Some are made per the kit directions, some were my own design, but all were fun!  The beautiful paper line in the kit was Julie je'taime, which apparently is past tense, also, as I could not find a link for it.  Not to worry, though!  They have a NEW Christmas Card kit with some of their beautiful Cracklin' Rose paper!  See it here.


There were acutally about 16 cards in the kit.  These are the ones I haven't used yet!

Enjoy!  Jules

Monday, December 10, 2012

"Artful" Christmas Card ~ 5

Hi Everyone!  Sharing another card made from this Paper Wishes product.  The red matting is called Glimmer Paper, found here.


It has been alot of fun creating with this set of papers and die cuts!

Be Inspired...

Jules

Sunday, December 9, 2012

"Artful" Christmas card ~ 4

Hello all!  It's time to share another "Artful" Card today!  The card is made from this Paper Wishes product.


The card inside..

Enjoy and be inspired....  Jules


Wednesday, November 28, 2012

Christmas Cottage Countdown Gift Card

Hello Bloggers!  Sharing a little card today.  Teresa Collins' Christmas Cottage Paper Pack was used for this card as well as Spellbinders Spiral Rose die and Cricut (pocket and bracket mats).

Ink : Vintage Photo 

Using 'Christmas Countdown' rectangle, green journaling ticket, green "December", Calendar and 'A Merry Little Christmas' rectangle from the die-cut sheet


Enjoy and Be Inspired!

Jules


Monday, November 26, 2012

Christmas Gift Card HoldersTutorial

Hello fabulous Bloggers!  I am sharing a tutorial for gift card holders today.  For this card, start with a strip of double-sided card stock, 5.5" x 12".  To conserve on paper, up to 6 x 12 may be used (2 cards per sheet of 12 x 12 card stock!  Yay!).

  • Score the 12" side at 4, 6 & 8''
  • Fold the card stock so that it looks like  the picture below, with the 4" and 8" scored sections meeting to form the card fold
  • Use a 2.5" circle punch to create a slot in the 2" section on the inside center of the card.  For for thicker paper, make a slit where the punch would have been used.  If a slit is cut, it can be cut so that the gift card is either vertical or horizontal.  In the photo below, the gift card is horizontal.
  • Add any mats for the center section, then glue ONLY the sides and bottom of the center section, forming the pocket to hold the gift card.
  • Decorate as desired!
  • There is a variation for this card:  the center section can be glued to either side of the card inside, so that the card pocket stays put.
The finished size is 5-1/2"h x 4"w


An A2 sized envelope will work for this, but I made a top-fold envelope to fit these cards. 
  •  start with an 8-1/4 x 9-1/2 envelope weight paper ( I use 65lb. paper) or coordinating cardstock

  •  with the 9-1/2" side at the top of the scoring tool, score at 2-1/2" and 6-3/4", top to bottom
Score @ 2-1/2 "


Score @ 6-3/4"


    • rotate to the 8-1/4" side and score at 3/4" & 6-7/8", top to bottom
    score @ 3/4''


    Score @ 6-7/8"

    • cut away the four corners, at slight angles for a nice fold
    • use a corner rounder on the 1-3/8" flap, 3/4" flap and top of the large flaps
    Showing cut-away corners and rounded edges
    • fold the two large flaps into the center and glue

    • fold the 3/4" flap up and glue
    Assembled envelope 4-1/4 x 6" when closed

    • embellish the top flap with  patterned paper to match the card to be placed inside using a 1-3/8 x 4-1/4" strip with two corners rounded to match the flap
    Tip:  If you tend to over-embellish cards that are too thick for a normal envelope, you can make an envelope box by adding 1/2'' to the length and width (now 10 x 8-3/4'').  For this size, score the 10'' side @ 2-3/4'', 3'', 7-1/4'' & 7-1/2".  Score the 8-3/4'' side @ 3/4'', 1'', 6-1/4'' & 6-1/2''.

    Cosmo Cricket and SEI papers and embellishments were used for these cards
    red ruffled ribbon: Recollections
    red glitter ribbon: JoAnn
    EK Success punch-Edger Flourish Scroll
    Wausau Pearlized card stock (red & green)
    Christmas Stamps  / Red Stazon


    I hope you enjoyed the tutorial.  Come back to the blog soon!

    Be Inspired!

    Jules

    Saturday, November 3, 2012

    Teresa Collins Christmas Cottage Photo Album

    Back today with another Teresa Collins project for the Bloomington Scrapbooking Studio!

    This is really not a mini-book!  It is a photo album with a few embellishments on each page...It started with a Basic Grey chocolate album from a bargain bin at the Scrapbooking Studio in Moline!  I used five of the ten chipboard pages to create the album.

    Each page was covered with patterned paper, then trimmed with a pen knife.

    Chipboard and die cuts, Prima bling, a few banners, a rosette and some stickers adorn the cover.  Some of that beautiful red gathered tulle ribbon was tied onto the binding rings.


    The inside pages are simply mounted photos with some journaling, gems from TC Fabrications line, die-cut and chipboard phrases and stickers.


    and...a little trick I used to make it appear that every other page of the album was dark, light, dark, light:  The back page was the dark red with polka dots, so a piece of cardstock was hand cut as an edge for the back page, so that when the book is closed, there is more symmetry with the colors.  Yeah, I know, I am a little picky...


    I hope this album inspires your next project!

    Be Inspired!
    Jules


    Monday, October 29, 2012

    Teresa Collins Christmas Cottage

    Hello Bloggers!  It has been a very busy month for this blogger!  I have only had one weekend off in the past six weeks!  Yikes!  But I did manage to get in some crafting because one of my weekends was a girlfriend's getaway!  Yeah!  (Missed you, Nette!)

    So, let's get started:  First up, a design team layout project for The Scrapbooking Studio in Bloomington.

     The thought process behind this layout was to create a Christmas gift with the Striped POW! glitter paper as the "ribbon."  The 'bow' is a layered die cut flower from the line which was curled with a dry-embossing stylus.  A TC Fabrications brad finished off the center and on the tag.


    The flower and the banners were spritzed with Mr. Huey's mist to give them some sheen.  The sticker and die cut sheets were pieced to make the title on the gift tag, with journaling on the back.


    The next layout has stickers, chipboard, die cuts, Prima flowers, pleated ribbon, hidden journaling and lots of layers and Stickles!


    The flower grouping...


    This flower was handmade from pleated velvet and organza ribbon, centered with a TC jewel from the line.


    Some of the die-cuts and chipboard...


    Cool hexagon stickers, too!


    The Teresa Collins Christmas Cottage line is very popular at The Scrapbooking Studio - stop  by to get yours today!

    Thanks for stopping by today!

    Be Inspired!  

    Jules