Showing posts with label Card Gift Cards. Show all posts

Wednesday, December 26, 2012

Christmas Cash Gift Card

Hello fabulous Bloggers!  I hope you all had a wonderful holiday time surrounded by loved ones!  Tutorial Time!  I did this project for Christmas 2011, but by the time I wrote the tutorial, it was long after the holidays, so it was saved for this year!  I know it is now after Christmas, but this tutorial can be used with any paper theme!

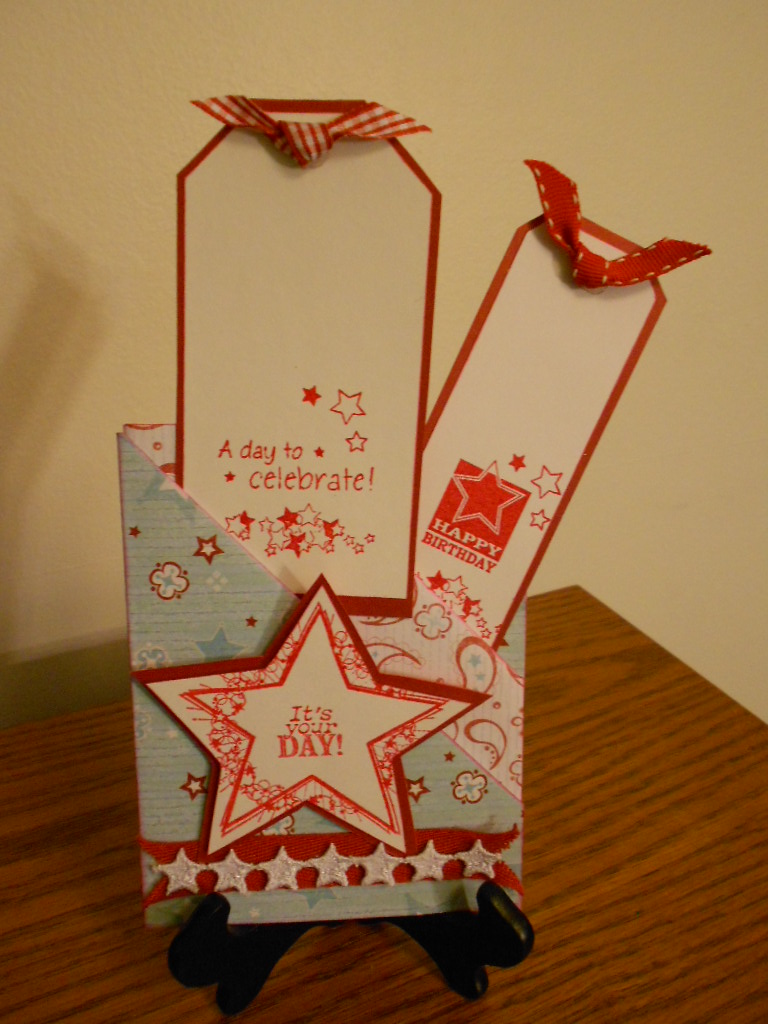
This cash holder starts out as 12" w x 7" h double-sided patterned card stock. If you edge punch the top of the card, as in this example, make it 7.5" h
  1. All pieces were inked with Ranger Festive Berries Distress Ink prior to assembly. 
  2. Score the card stock at 4 and 8 inches from the left side.
  3. Crease and fold so that the card front is facing you.
  4. Open card and make a light pencil mark about 2 1/2 inches from the BOTTOM of the right edge.
  5. From the pencil mark to the 8" score line, cut away the paper to make the angle for the cash pocket. Do not glue, yet!
  6. For the lattice trim, punch a 12" strip of paper or card stock, layer with a stripe, then a solid.
  7. Begin layering onto the card at the inside of the pocket, wrap around the back to the front and then inside, gluing as you are wrapping.
  8. Glue the short edge and bottom only to secure the pocket.  
  9. Cut a tag, layer, stamp a sentiment and add a knotted ribbon.
  10. Foam tape the tag over the end of the lattice trim.
  11. Add a layered sentiment and a bow onto the front with foam tape.
  12. Stamp and layer a sentiment to the inside, left.
  13. Make an envelope box to fit the card. This one was made with The Enveloper from Crafter's Companion.  There is a downloadable chart here to make over 100 sizes of envelopes.
  14. Punch a 12" strip with the lattice punch and layer onto a second 12 " strip.
  15. Wrap the layered band around the envelope and secure the ends to each other, not to the envelope, you want the band to slip off to open the envelope!
  16. Layer Poinsettia Silk Flowers (mine are from Paper Wishes) and silk leaves.  Attach to the seam on the band.
  17. For the envelope tag, an EK Success slim square bracket punch was cut from cream card stock and stamped with To and From stamps in Red Stazon.


Inside Pocket


Monday, February 6, 2012

Valentine Projects-Pinecone Press

Hello  and Happy Monday, bloggers!  Glad you could stop by today!  The projects I am sharing today came from a Pinecone Press papercrafting kit.  My  LSS, Scrapbook Dreams handed it over and said, "Make some things for us to display in the store!"


First up, a gift card holder, pretty simple. The scallop heart is a Marvy Uchida  punch - 2" and the little red cherubs are from a cassette punch set - are they not adorable!?
     Inside, the pocket is trimmed with one of the edges of the papers - they all have a cute little design on them & that means I didn't have to throw anything away!
   

 All the papers and ribbon seen in the projects were included in the kit.  All I added were the punched items (from kit papers) buttons with scrapping floss on the box lid (below) pop dots and Ranger Distress Ink in Festive Berries!  Those Ranger seasonal inks are becoming quite versatile!


Next up, is this adorable exploding box!  This was so much fun to make, and really easy, too! The two inside layers of the box are tag pockets.  If I counted correctly, this little gem will hold almost 30, yes 30(!) photos!  There was still paper to make a few more cards, but time was running out to get them displayed at the store for Valentine's
Day! 


Another Valentine project coming soon!  Thanks for peeking in today!

Inside Box Lid

Two Layers of pockets with tags for photos


Thursday, January 19, 2012

A Pair of Heels

 Hey Bloggers!  How about this pair of heels?    They are cut from zebra flocked paper (Paper Wishes) with Tie the Knot cart  from Cricut.  Nestabilities dies were used to make the layered labels and the sentiments were printed on the computer. 

An EK Success edge punch made the dotted strip inside the card even more dotty!   Thanks for looking today!

Sunday, January 1, 2012

More Card Projects


Happy first day of 2012 to everyone out there!  It is a very windy Sunday afternoon here in Central Illinois!

These Cards were made using a tutorial from Splitcoaststampers and were given as gifts to my office staff.  It helps to have DS cardstock, but for these, I used SS coordinating papers from a DCWV pad purchased at a yard sale!  Spray adhesive was used to turn the SS into DS.  It did get a little thick where the folds were, so after doing a few, some of the inside layers were cut away and used to decorate the envelope flaps. 

All of the tags and front focals were made from scrap cardstock (yes scraps!)  Since the tags were layered, I made a template for hand cutting them.  Someday, I need to use my Cricut more for these big projects!

The stamps and star template used on the card front and the smaller inside tag are from Paper Wishes, the larger tag stamp is from Inkadinkado Clear Stamps, Humorous Birthday Set.


The ribbons were all from personal stash collected over a number of years.

Tools used: 3” circle, 3 ½” scallop circle punches; cutting mat, exacto knife, scissors

 Pigment chalk inks from Quick Quotes used: Blue Hawaiian, Maraschino Cherry, Very Berry and Midnight Confession

This is the sympathy card.  .  The front and inside sentiments were printed on vellum from this Paper Wishes CD.  The vellum edges were torn and inked with Very Berry from Quick Quotes.  Scraps were used for the green and cream squares.  A paper sack (really!)from my LSS was punched with the Martha Stewart doily lace punch.  The lace layered over the punched border on the front started out as a double-width piece.  It was cut in half to make two narrower strips and embellied with half pearls.

Have a great week!  Jules