Showing posts with label EK Success. Show all posts

Wednesday, December 26, 2012

Christmas Cash Gift Card

Hello fabulous Bloggers!  I hope you all had a wonderful holiday time surrounded by loved ones!  Tutorial Time!  I did this project for Christmas 2011, but by the time I wrote the tutorial, it was long after the holidays, so it was saved for this year!  I know it is now after Christmas, but this tutorial can be used with any paper theme!

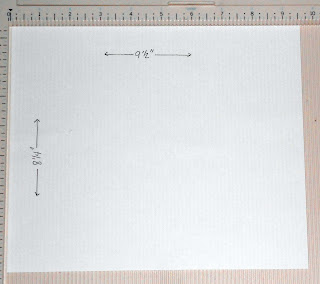
This cash holder starts out as 12" w x 7" h double-sided patterned card stock. If you edge punch the top of the card, as in this example, make it 7.5" h
  1. All pieces were inked with Ranger Festive Berries Distress Ink prior to assembly. 
  2. Score the card stock at 4 and 8 inches from the left side.
  3. Crease and fold so that the card front is facing you.
  4. Open card and make a light pencil mark about 2 1/2 inches from the BOTTOM of the right edge.
  5. From the pencil mark to the 8" score line, cut away the paper to make the angle for the cash pocket. Do not glue, yet!
  6. For the lattice trim, punch a 12" strip of paper or card stock, layer with a stripe, then a solid.
  7. Begin layering onto the card at the inside of the pocket, wrap around the back to the front and then inside, gluing as you are wrapping.
  8. Glue the short edge and bottom only to secure the pocket.  
  9. Cut a tag, layer, stamp a sentiment and add a knotted ribbon.
  10. Foam tape the tag over the end of the lattice trim.
  11. Add a layered sentiment and a bow onto the front with foam tape.
  12. Stamp and layer a sentiment to the inside, left.
  13. Make an envelope box to fit the card. This one was made with The Enveloper from Crafter's Companion.  There is a downloadable chart here to make over 100 sizes of envelopes.
  14. Punch a 12" strip with the lattice punch and layer onto a second 12 " strip.
  15. Wrap the layered band around the envelope and secure the ends to each other, not to the envelope, you want the band to slip off to open the envelope!
  16. Layer Poinsettia Silk Flowers (mine are from Paper Wishes) and silk leaves.  Attach to the seam on the band.
  17. For the envelope tag, an EK Success slim square bracket punch was cut from cream card stock and stamped with To and From stamps in Red Stazon.


Inside Pocket


Monday, November 26, 2012

Christmas Gift Card HoldersTutorial

Hello fabulous Bloggers!  I am sharing a tutorial for gift card holders today.  For this card, start with a strip of double-sided card stock, 5.5" x 12".  To conserve on paper, up to 6 x 12 may be used (2 cards per sheet of 12 x 12 card stock!  Yay!).

  • Score the 12" side at 4, 6 & 8''
  • Fold the card stock so that it looks like  the picture below, with the 4" and 8" scored sections meeting to form the card fold
  • Use a 2.5" circle punch to create a slot in the 2" section on the inside center of the card.  For for thicker paper, make a slit where the punch would have been used.  If a slit is cut, it can be cut so that the gift card is either vertical or horizontal.  In the photo below, the gift card is horizontal.
  • Add any mats for the center section, then glue ONLY the sides and bottom of the center section, forming the pocket to hold the gift card.
  • Decorate as desired!
  • There is a variation for this card:  the center section can be glued to either side of the card inside, so that the card pocket stays put.
The finished size is 5-1/2"h x 4"w


An A2 sized envelope will work for this, but I made a top-fold envelope to fit these cards. 
  •  start with an 8-1/4 x 9-1/2 envelope weight paper ( I use 65lb. paper) or coordinating cardstock

  •  with the 9-1/2" side at the top of the scoring tool, score at 2-1/2" and 6-3/4", top to bottom
Score @ 2-1/2 "


Score @ 6-3/4"


    • rotate to the 8-1/4" side and score at 3/4" & 6-7/8", top to bottom
    score @ 3/4''


    Score @ 6-7/8"

    • cut away the four corners, at slight angles for a nice fold
    • use a corner rounder on the 1-3/8" flap, 3/4" flap and top of the large flaps
    Showing cut-away corners and rounded edges
    • fold the two large flaps into the center and glue

    • fold the 3/4" flap up and glue
    Assembled envelope 4-1/4 x 6" when closed

    • embellish the top flap with  patterned paper to match the card to be placed inside using a 1-3/8 x 4-1/4" strip with two corners rounded to match the flap
    Tip:  If you tend to over-embellish cards that are too thick for a normal envelope, you can make an envelope box by adding 1/2'' to the length and width (now 10 x 8-3/4'').  For this size, score the 10'' side @ 2-3/4'', 3'', 7-1/4'' & 7-1/2".  Score the 8-3/4'' side @ 3/4'', 1'', 6-1/4'' & 6-1/2''.

    Cosmo Cricket and SEI papers and embellishments were used for these cards
    red ruffled ribbon: Recollections
    red glitter ribbon: JoAnn
    EK Success punch-Edger Flourish Scroll
    Wausau Pearlized card stock (red & green)
    Christmas Stamps  / Red Stazon


    I hope you enjoyed the tutorial.  Come back to the blog soon!

    Be Inspired!

    Jules

    Monday, November 5, 2012

    Paper Wishes Color Me...

    Un-colored!  Hey, everyone! Another wedding card up for viewing on the blog today!

    The base is purple card stock with a layer of plain vellum,  printed heart vellum and an Ebony Color Me Lace card topper.  You gotta try these card toppers from Paper Wishes!  Click the link to see more. You can use any kind of color you want to achieve your look (as I did a few posts back), although for this, one I decided not to color it at all!

    The center of the card topper was cut out with an exacto-knife so there would be a "window."  A Spellbinders Fancy Tags 2, cut with the Big Shot,  and adorned with matching pearl bling, created the focal.


    A triple loop purple satin bow, adorned with Jenni Bowlin and Maya Road Pins and a double heart charm, trimmed the right side of the card front.


    The card inside was vellum layers and cardstock, cut with Spellbinders Labels Eight and another Fancy Tags 2.  The Congratulations banner was part of the Ebony Color Me set.


    A little pocket for some cash...EK Success Edger Scroll & Hearts punch made the pretty trim.

    This is what the card looks like when opened...

    The card was a little thick with the bow on front, so I made an envelo-box with a Martha Stewart Scoreboard, added a belly band using EK Success Rose Bush Large Slim Punch, Anna Griffin flower and punched labels.

    The inside of the envelope was lined with lavender glimmer paper and purple card stock.


    Thanks for peeking in today!

    Be Inspired!

    Jules


    Thursday, October 4, 2012

    Distress Me

    Hello Bloggers!  Sorry, I have been absent from the blog.  It was wedding prep for a week or two!  More pics on those projects later.

    Today, I am sharing a little storage project (very plain~sorry!).  You see, I keep the foam blending pads for Distress Ink in little ziploc bags.  There were so many of them, they needed some better organization.  Something that could be kept out in my scrappy space, but could also be portable to go to a class or crop.

    This is how it will look when transporting to a crop:


    Contents, with a little room to spare!


    Base sitting inside the box lid...


    Quick Quotes to the rescue!  Some Julie Je'taime paper formed a box base and lid with the Martha Stewart Scoreboard; an EK Success punch (Large Journal Plate & Bracket) cut the label for the box lid; Hero Arts alphabet letters stamps and Dusty Concord Distress Ink were used for the title and dragonfly accents.


    More projects coming soon!  Be Inspired!  Jules

    Sunday, September 2, 2012

    Quick Quotes and Spellbinders Dies...

    ...make some great looking cards!  Just look at this beauty up today!


    One of my dear friends retired this past week, so this is what I came up with to send her off into the wonderful world of retirement (I am only guessing that it is wonderful, as I wouldn't know from personal experience!).  The base is Quick Quotes' Julie je t'aime JT100.  On top of that is a layer of lavendar card stock and an old card front cut from the two largest Spellbinders Nestabilities Label Eight.

    After the pieces were cut and embossed with the die, they were left in the die and Milled Lavendar Distress Ink was blended onto the edges.  A triple-loop bow using that great peg bow maker was made from Sugar & Spice ribbon (purchased at Michael's) and wrapped around the top layer.


    The top layer and the sentiment were foam taped onto the lavendar layer.

    Butterflies were punched with a three-layer butterfly punch from EK Success (see it at Jo-ann).  The centers were adorned with purple bling and the wings of the single-layer butterflies were accented with aqua nailhead stickers from Mark Richards (Hobby Lobby).  The three-layer butterfly on the top right of the card was embossed with an embossing folder (all three layers together).

     A closer look at the details...The embossed butterfly below.


    This is the inside of the card.


    An envelo-box was made from more JT100.  A belly-band was made from a strip of Quick Quotes Andrew Avenue AA200 - loved that paper line - good thing I still have a great stash of it!  :), along with a strip of JT100 and a layer of ribbon.  A tag was punched from the reverse side of the JT100 and attached to the triple-loop bow with purple scrapper's floss.

    A special personal note to my friend was written on a couple of journaling notes and attached to the inside left of the card, in case she wanted to remove them.

    To all my blogger friends out there, have a safe, happy and labor-free Labor Day!

    Until next time...Be Inspired!  Jules

    Monday, August 20, 2012

    The last of the 7gypsies cards...

    Thanks for stopping by the blog today!  I have more 7gypsies cards to share. Are you getting tired of them, yet?  I promise, this is the last post!


     As with the previous cards, kraft card stock was run through the Big Shot with the Sizzix Card Fronts, A2 Eyelet & Ornate die.   For these, one of each style was cut.

    A piece of patterned 7gypsies paper was cut to fit just above the ornate edge, then edge-punched with an EK Success Edger punch, Elegant Flourish Scroll.  The sentiment (an old SEI stamp) was stamped with Distress Embossing Ink and heat embossed with black embossing powder.  All the card edges were inked with Victorian Velvet Distress Ink and a blending tool.


    For this card, another piece of patterned paper was cut to fit the top 2/3 of the card base.  To that, two edger punches from EK Success were used to keep the circle theme going ~  Donut Chain and Bubbles.  The little frame was fussy-cut from another piece of the 7gypsies patterned paper and letter stickers were used to spell "thank you."  Foam tape was used to give the sentiment some dimension.


    A little ribbon from my stash tied into a triple bow with Becca's  Peg Bow Maker, topped off each card.

    Thanks for stopping by today!  Be Inspired!  Jules

    Wednesday, August 1, 2012

    Wedding Mini Album

    Hello Bloggers !  This is gonna be a really long post with lots of photos and descriptions, so grab a drink, sit back and scroll!  Click on any photo for a better view and click on the links to see more product.

    This mini, again, was made for bonus daughter, Allison's bridal shower gift.  The pattern is from Laura Dennison's website.  She is an amazing designer!  The album is appropriately named  Happily Ever After!

    This is the cover.  It is layered with Teresa Collins Mr. & Mrs. papers, lace and a scroll band cut with an EK Success large edger punch found here.  The Prima bling (Say it in Crystals-Vintage Swirl) was then layered on.  The flowers were die cut on my Big Shot with Tim Holtz tattered flowers dies and Spellbinders foliage die.  All were dry-embossed and layered for dimension.  Pearl stamens were added to the larger flower centers.

    These two are the bride's pages, the veil on the left and the train on the right.  The black binding tabs were cut from Spellbinders Donna Salazar's Creative Page Tabs die using Core'dinations black pearl papers.  The papers are heavy-weight and hold up well for this purpose, plus they give a little shimmer to the otherwise boring binding tabs!  The purple scallop circles and hearts were punched with Marvy Uchida punches.  The purple papers were misted with Mister Huey's Shine from Studio Calico and The Scrapbooking Studio

    It's a little hard to see, but the veil is lifted and the train is pulled out for a little interactive photo placement!

    The rings and the groom pages.  All of the pages have pockets on one side with photo mats tucked inside.  All the pages were edgee-punched with a Martha Stewart Doily Lace punch.

    Inside the grooms' page...the "shirt collar" lifts out to a photo mat and the printed paper tucked into the "cummerbund" is also a photo mat!


    For the Maid of Honor and Bridesmaids...

    Best Man and Groomsmen...

    The cake and the toast.  The cake layers lift out to reveal love quotes.

    The inside of the Toast page...

    Another look at the cover.


    Allison loved the book, and since she also is a scrapper, I know as soon as her photos are received, they will be placed into this great mini!

    Thanks for stopping by today.  I hope you were a little more wowed today than yesterday!

    Be Inspired!  Jules

    Monday, July 9, 2012

    Retirement Gift Project

    Hello awesome bloggers!  Today's post is the gift I made for my 'retiring' friend!  Before you scroll down, guess what is inside!  I you read this blog regularly, you would have seen something similar on a previous post!


     The lid is off...still wondering?

    Yes, it is a stationery box, partially made from an SEI template.  A few modifications were made to make this one my own:  Loopy ribbon, scalloped edges everywhere.  I has three pockets, address book, pen holder and pocket for postage stamps! 

    Address book open...

    Pocket in the back will hold A2 cards perfectly or even 5x5's.  The left pocket is the perfect size for a 3x3 pad of sticky notes, or a stack of gift cards.


    Six greeting cards were made for use on any occasion and placed into the back pocket.  They are blank inside.

    The outside view with layered flowers and bling from Prima.  The box bling is from Hobby Lobby.


    If any of you out there are Quick Quotes fans, the papers used for this project are from an old Quick Quotes line called Bandana-Rama.  The colors are just so cheery!

    Quick Quotes products are really the main reason I fell in love with scrapbooking!

    Stop by the blog any time!  Be Inspired!  

    Jules