Showing posts with label Maya Road. Show all posts

Sunday, November 25, 2012

Crate Paper Acorn Avenue Tag Book

Hello blog friends!  It's time to share an altered project completed for the Scrapbooking Studio in Bloomington, IL.

Up today is a little tag book  loaded up with some fun photo booth shots taken at daughter Allison's wedding.  Also used were some coordinating adhesive-backed chipboard, stickers, border stickers, paper flowers, all from the Acorn Avenue line, and cream burlap ribbon.  Vintage Photo distress ink was used on all the papers and embellishments.


The book title was made from the logo on the photo strips and backed with card stock.


The photo mats are Maya Road kraft paper calendars; there are also some Maya Road kraft and clear mini tickets tucked in.


 As you can see, just like the entire paper line, there are bits of 'randomness' all through the book!


All of these items are available at The Scrapbooking Studio!  Stop in today!

Be Inspired!
Jules


Wednesday, August 8, 2012

7gypsies Trousseau Photo Box

Hello everyone!  I am back today with a post for The Scrapbooking Studio in Moline, IL!  The projects designed this month are from the 7gypsies line, Trousseau Collection.  The papers are so vintage and just my style!

My altered project for August is this little photo box, made with 7g book covers.  You can see the front cover peeking out from behind the little envelope stuffed with more 7g goodness!  There is a journal card, two tag envelopes, a charm and a few stickers from the sticker sheet.  And how about that crochet lace trim at the bottom.  It is just gorgeous!


This is another front shot, showing the photo tags which fit inside.  They are 5 x 7, so full size photos will fit on them!

 A closeup of the handmade loopy flowers, tulle, a triple-loop bow and Maya Road Clocks...

For the tag pocket it the center, an adorable sticker was backed with kraft cardstock and mounted on the pocket.  The little girls in the photo are holding hands, so I added "a hand to hold" phrase from the sticker sheet.  Three tags were punched to insert into the envelope.  The center tag has a 7g charm attached.


The photos placed on the tags are actual vintage photos of my ancestors and other family!
 Patterned paper was added to each tag, with varying enhancements, like the vellum photo corners below...


for the tabs on the tags, a scallop circle of patterned paper was added to a kraft circle, folded in half and stapled to the tag.  Tattered Angels Pashmina Glimmer mist was used to color the tulle 'ribbons' accenting the tag tops.


This is a really cool photo of my great grandmother.  It is a post card she mailed to a family member in the early 1900's ~ I cannot read the date, but she passed in 1918, so it is nearly 100 years old!  So that the back of the post card can be seen, it was attached with a 'hinge' of patterned paper.


Stop by The Studio today to get your 7gypsies products!

Thanks for stopping by today!  Be Inspired!  Jules

Wednesday, June 6, 2012

7 Gypsies Pocket Envelope Accordion Mini Book

Hello Everyone!  Thanks for stopping by the blog!  Up today is a Scrapbooking Studio design team project for June.  This month, I had the opportunity to work with 7 Gypsies Postale Collection.  

Warning!  There are lots of photos - this is a 22-page mini album!  Yes, I got a little over-ambitious, but this baby has a lot of real estate! Click on any photo to see a larger image.

The Cover with Vintage Trinket, collection stickers, mini labels, rosettes and Prima Bling:


Title Detail

Rosettes with stamped and sticker centers
The "Real Estate"~10 Index Envelopes with Index cards for inserts.  See those page tabs?  They are made from the 7Gypsies  packaging!  Arrow stickers from the collection sticker sheet point out that there is more to see!


Right, the accordion binding, stamped with Tim Holtz Mixed Media Stamps and Coffee Archival 


Some of the page photos are not in the same order as the book.  This is one of my struggles as a blogger!


The last page and inside back cover: Index Post card photo mat, side pocket and matchbook with hidden journaling ticket

Walnut Stain Distress Ink and Quick Quotes Maraschino Cherry were used on this project. Hope you had fun looking at the Postale Collection from 7 Gypsies.  Stop by The Scrapbooking Studio to get your supplies for this one!

Please stop in again soon to see more 7 Gypsies product!

Be inspired!  Jules


Thursday, April 12, 2012

Graphic 45 Layout 1

Hello fabulous bloggers!  For my April design team gig at The Scrapbooking Studio, I squealed with delight when the Olde Curiosity Shoppe line from Graphic 45 was given to me to work with!  The papers are so unique and beautiful!  The first layout was a photo of my great grandmother as a young woman.  I liked how the Exquisite Motif paper enhanced the vintage photo.

The 2-piece frame, top border treatment and blue background were cut on the Cricut using Fancy Frames and Elegant Edges carts. The bottom layer of the frame was background stamped prior to layering.  Vintage ivory lace and  blue Maya Road lace were layered below the frame.


Both sides of Race for Time paper were used to make flowers from an EK Success Slim punch - Quilling Carnation and some of the G45 metal flowers were layered in with paper flowers.  There are also some Prima and Petaloo Flowers nestled in.  Blingy brads from my stash filled the flower centers.  Some Tim Holtz swirled die-cut grungeboard, stained with Peeled Paint Distress Stain, were used as vines.  To finish off the flowers and vines, Mister Huey's Color Mist  (from Studio Calico) was spritzed on them.  The color is called "shine."  See below for a closer view of the flowers.

Inks used for this project:  Quick Quotes Baja Blue, Wild Honey Distress, Peeled Paint Distress

That is all for today!  Another layout coming soon!  Thanks for stopping by today and ... Be Inspired!  Jules

Saturday, March 17, 2012

Little Yellow Bicycle Layouts

 Hello Bloggers!  Post number 2 of 3 for The Scrapbooking Studio/Moline here for you showing some more of the Little Yellow Bicycle and Maya Road product goodness I received to work with this month!  I just love this background page for these engagement photos of my son and now-daughter-in-law!  The page was actually designed around the great elements printed on the paper!
See that title lettering?  It started out as naked chipboard, painted white, then stamped with red Stazon using a flourish stamp.  Pins were added at each end of the title block for some added dimension.
                                                     A detail shot...
 The paper had a stitch pattern printed in white.  The red eyelets and red/white twine made it pop off the page and then I thought it needed "Two Tickets to Paradise" since it was their engagement, after all!
 The edges of the brown photo mats were stamped in Azure Stazon with a flourish stamp and the red and white paisley mat was corner punched for a little elegance...
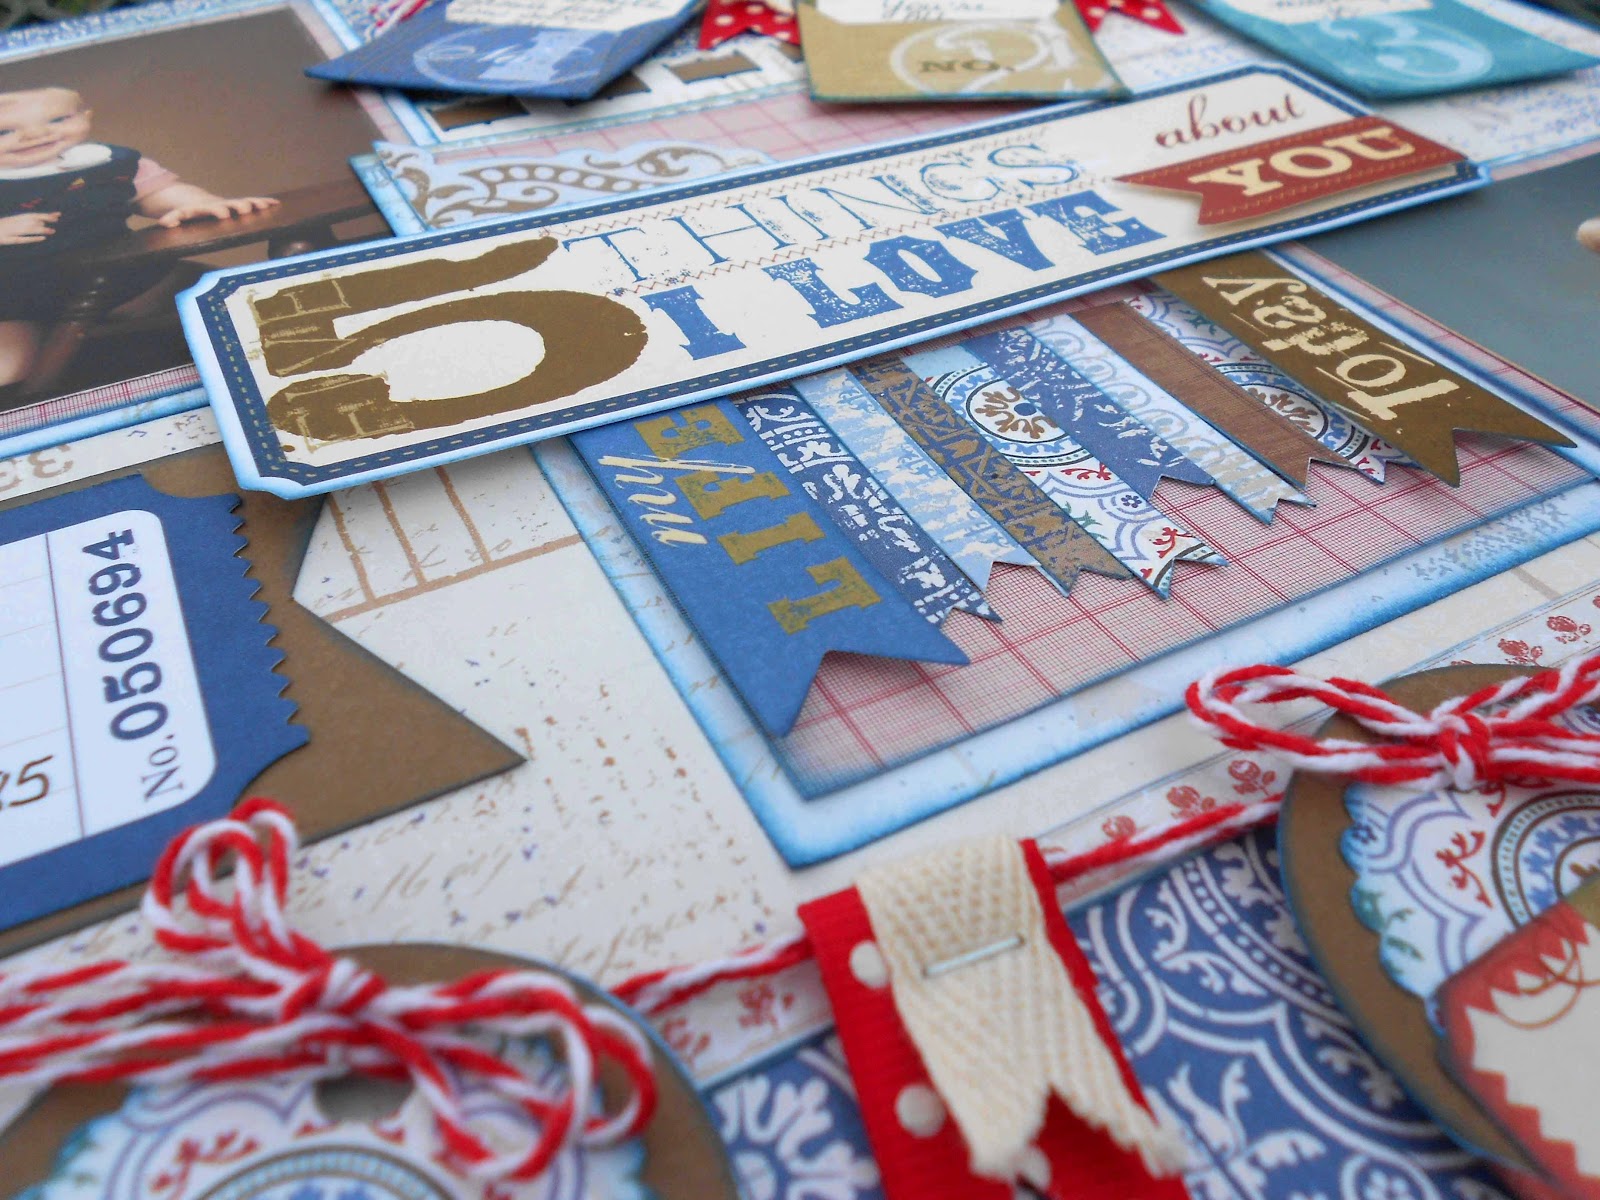
 The next layout was the same son as the layout above, only he was ONE YEAR OLD!   I loved working with the "5 Things" stickers and envelopes ~ they were so much fun and it gave me a great opportunity to express how I feel about him at this age.
 The envelope journaling stickers were just screaming to become a banner, so I figured out a way to make it work on the page.  The insides of the envelopes were plain white, so 1.75" circle and 1.5" scallop circle punches were used to layer brown and patterned papers onto the envelope flaps.  Ribbons were layered and stapled to the banner and added under the mini rosette, which was created with a 3/4" strip, scored every 1/8" then edge punched and inked blue.  The rosette was glued to a larger scallop punched piece and topped with a de-bossed circle sticker.
And lastly, a detail shot of the center treatment.

Thanks for stopping by today!

Be Inspired!  Jules