Showing posts with label chalk ink. Show all posts

Monday, March 18, 2013

Quick Quotes Altered Canvas Mini

Hello out there!  It has been a while since my last post, so it's time to share a project with you.  This one was very special.  My niece lost a very dear friend and had very few photos of him, so I put together this little canvas kit from Quick Quotes for her to look at whenever she was missing her friend.
All the chipboard pieces (in silver) were inked up with Silver Metallic Stazon.  After the ink was dry, Tim Holtz Fabulous Flourishes stamps were used on the page tabs and black metallic paper was placed behind the cut-out letters.  The chipboard photo frames were done in the same technique, using a  stamp from Hot Off The Press, Artful Collection. A close-up is below.


Inside Pages:


A closer look at the metallic ink with the stamping.

The entire project was inked with Quick Quotes Midnight Confession Powder Puff Chalking Ink.

Thanks for stopping by the blog today!
Be Inspired!
Jules

Product Links:


Tuesday, August 14, 2012

Baby Boy Card with Quick Quotes and Paper Wishes

Hello to everyone out there on the blog today!  This is a baby card I made a while back, but I guess I neglected to share...so here it is...

The left side with the knotted ribbon is on the envelope.  The card background and the envelope matte were stamped with a patterned stamp, embossed with baby blue embossing powder and then colored in with Quick Quotes Chalk Inks in Green Tea, Amaretto and Mocha Mama.  The patterned paper with stars is from Quick Quotes, heavily inked with Mocha Mama Chalk Ink from Quick Quotes.  The sentiment and baby picture are also from Quick Quotes - It's a Boy vellum strip.  Smooch inks were used on the back of the vellum to color in the picture of the baby in the cradle.  For the main focal, a frame stamp from Paper Wishes Labels & Frames set was stamped onto blue card stock.  The vellum piece was cut to fit the center shape and adhered with vellum Glue Dots.  Corner punches and little blue pearls finished off the focal.


On the inside, corner punches hold the vellum in place and an extra Congrats stamp(from Paper Wishes Labels & Frames stamp set) was added to the bottom of the quote.


Everything was inked with Mocha Mama Chalk Ink from Quick Quotes.  Click on the links to see the products used for this project.

Thanks for peeking in on the blog today!  Be Inspired!  Jules

Tuesday, July 3, 2012

CKC - Gimme 'dat Bling!

Hello awesome bloggers!  Today is another post from CKC Convention in St. Louis.
Up today is a really "blingy" LO from Quick Quotes.  Purple is one of my favorite colors, so I really enjoyed this one!  All the plain white matting was stamped with a large flourish stamp (Tattered Angels) and the photo mats on the right were stamped with a script stamp ~ it kind of tones down the bright white, don;t you think?


 The flowers and bling really made the layout pop...see that white, corkscrew-like thing?  It is wired raffia!  Cool!  All the paper flowers were dry embossed with a stylus and inked for some extra pop.
 There is even a little mini book on the left page...
 This layout holds a LOT of photos!  There is space for three photos on the outside of the pocket and five more on the tags!
A green center was added to this latex flower with some Limeade ink and a pen nib.
I cannot wait to add some photos to this one, but I'll have to wait until after bonus daughter's wedding in September!  It goes really well with her chosen colors!

QQ Chalk inks used in this project:  Purple Passion, Blue Hawaiian, Very Berry and Limeade

Thanks for stopping by today!  Be Inspired!  Jules

Sunday, May 20, 2012

Prima Card

Hello ~  Thanks for stopping by today to see this adorable card I made as a design team project for The Scrapbooking Studio!

The base is kraft cardstock.  The Sun Kiss Prima line has a sheet of journaling labels, one of which was cut from the sheet to make the perfectly framed background.  The Tim Holtz Caged Bird die was used to cut the bird and its cage, to which some Prima pearl bling was added.  A dry-embossing stylus was used to gently curve the bird cage to make it a little more 3-D.

The Prima flower was colored with a Ranger Craft Nib and Quick Quotes new Lemonade Powder Puff Chalk Ink and Vintage Photo Distress Ink.

The sentiment label is from a Cuttlebug cut and emboss folder.  On the inside, some more ribbon was weaved through the journaling block, stamped with Ranger Coffee Archival ink and a few more Prima pearls.


Thanks for peeking in today...and...Be Inspired!   Jules

Saturday, May 5, 2012

MOM Frame

Hello everyone!  Thanks for stopping by the blog today!  Wow, it has been a busy week!  I just returned from what I thought was going to be a Vegas Vacation....well...it turned into a Honeymoon in Vegas!   My significant other of 9 1/2 years (Jim) proposed on bended knee right in the middle of the Fremont Street Experience in downtown Las Vegas and we tied the knot at Vegas Weddings within an hour of the proposal!  To say I was surprised was a bit of an understatement!  What a way to begin our vacay!!

 This is my Mother's Day gift project for my Mom.  SSSHHH! Don't tell her!  She doesn't have a computer!  My mother is such a wonderful example to follow and I am so grateful to have her in my life.  She has always been supportive of me and my choices in life.  She let me make mistakes and learn from them, without an "I told you so."  It makes all of us who we are, right?  Anyway, I just want to show some love to my Mom....I love you, Mom!
This project was inspired by a Tammy Tutterow class I took recently at The Scrapbooking Studio.
Details:  The background is a wooden frame purchased at Michaels.  After the background was stained with Rusty Hinge, Tumbled Glass, Stormy Sky and Picket Fence Distress Stains, it was stamped with border and corner stamps before layering on the papers (Graphic 45 and Core'dinatons) and cotton batting.  The papers and batting were inked with Rusty Hinge Distress Ink.  Spellbinders Nestabilities Grand Labels 4 was cut for the center focal, embossed with a paisley Cuttlebug embossing folder and inked with Quick Quotes new Baja Blue chalk ink.  Love the rich color!
 The vine is stained with Peeled Paint Distress stain and inked with the same color distress ink.
 Tim Holtz goodies used were the post (die cut), letter cards, chitchat stickers, tiny attacher, grunge board swirls, foliage, vintage button, jump rings, brads, perfect pearls, stream alcohol ink.  The paper flowers are mostly Prima. The base of the metal flower is from Graphic 45, colored with alcohol ink.

Thanks for peeking in today!  Be Inspired...Jules

Sunday, April 29, 2012

Mom's Birthday

Hello Bloggers!  Thanks for stopping by the blog today!

My mother recently had her 75th (!) birthday, but you would never know it!  I sure hope I have her anti-aging genes!

For her card, a Paper Wishes Personal Shopper kit card was embellished with some really cool gathered purple ribbon - it came from my stash of thousands of ribbons (not kidding, thousands!).  Also, some gold outline stickers were added in the corners. 

On the inside, I cut a pocket from the TBBM Cricut cart, inked the edges with Quick Quotes Purple passion and stamped and image in Purple Stazon from PW's Birthday Greetings stamp set.

Thanks for stopping by today...be inspired!   Jules

Saturday, March 17, 2012

Little Yellow Bicycle Layouts

 Hello Bloggers!  Post number 2 of 3 for The Scrapbooking Studio/Moline here for you showing some more of the Little Yellow Bicycle and Maya Road product goodness I received to work with this month!  I just love this background page for these engagement photos of my son and now-daughter-in-law!  The page was actually designed around the great elements printed on the paper!
See that title lettering?  It started out as naked chipboard, painted white, then stamped with red Stazon using a flourish stamp.  Pins were added at each end of the title block for some added dimension.
                                                     A detail shot...
 The paper had a stitch pattern printed in white.  The red eyelets and red/white twine made it pop off the page and then I thought it needed "Two Tickets to Paradise" since it was their engagement, after all!
 The edges of the brown photo mats were stamped in Azure Stazon with a flourish stamp and the red and white paisley mat was corner punched for a little elegance...
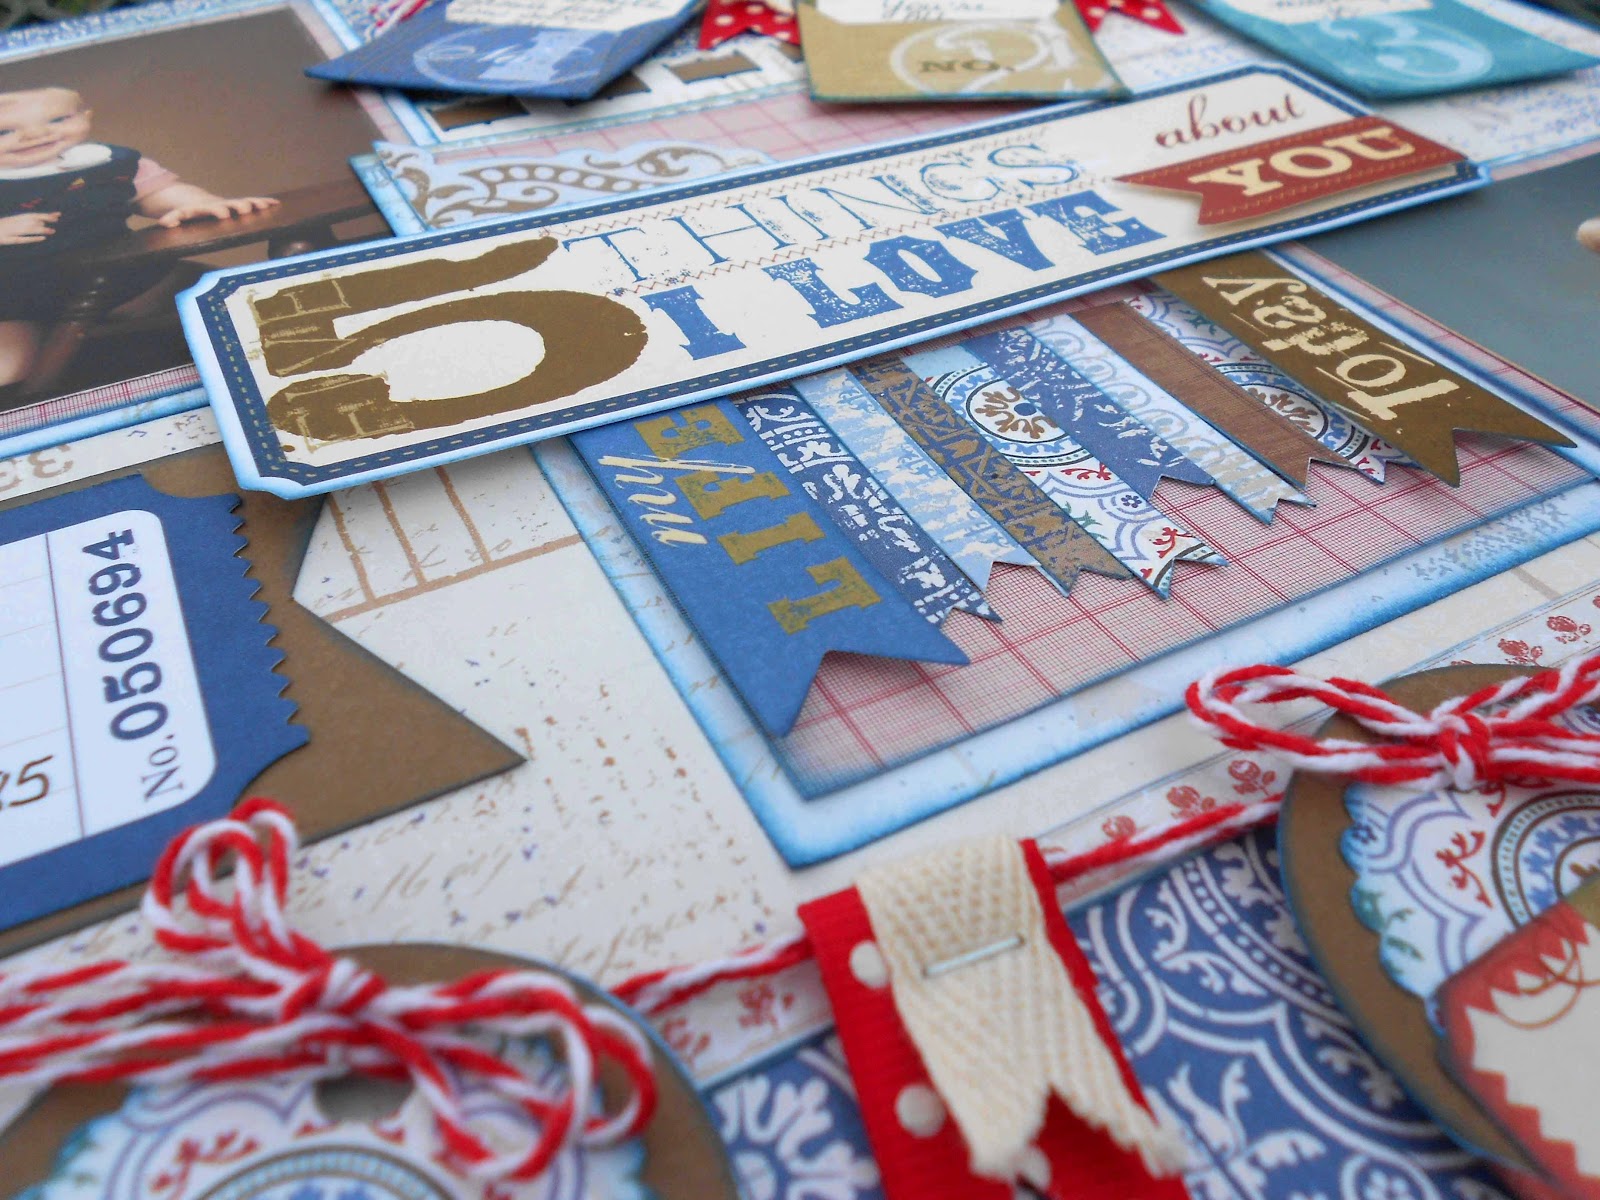
 The next layout was the same son as the layout above, only he was ONE YEAR OLD!   I loved working with the "5 Things" stickers and envelopes ~ they were so much fun and it gave me a great opportunity to express how I feel about him at this age.
 The envelope journaling stickers were just screaming to become a banner, so I figured out a way to make it work on the page.  The insides of the envelopes were plain white, so 1.75" circle and 1.5" scallop circle punches were used to layer brown and patterned papers onto the envelope flaps.  Ribbons were layered and stapled to the banner and added under the mini rosette, which was created with a 3/4" strip, scored every 1/8" then edge punched and inked blue.  The rosette was glued to a larger scallop punched piece and topped with a de-bossed circle sticker.
And lastly, a detail shot of the center treatment.

Thanks for stopping by today!

Be Inspired!  Jules

Friday, March 16, 2012

Little Yellow Bicycle Matchbook Mini

 Hello Fabulous Bloggers!  Today I am sharing the first of three design team projects for The Scrapbooking Studio/Moline.  Here are some detail photos, showing some of the adorable Little Yellow Bicycle Saturdays paper and embellishments: Felt flowers, pins, de-bossed stickers and tickets.  The tickets were packaged  matchbook-style, so the packaging was "altered" to make this mini ticket album!
This was a FUN project!  Also included are the Kraft paper clock, frames and clear ledger elements from Maya Road

 This is a close up of the pins - they were bent to give a little more dimension.  The frame backing the Dream diecut sticker and the left flap of the mini were embossed on the Big Shot with a Sizzix strip and embossing folder.


 Inside cover-the floral spray was altered with blue ink and then vintage photo distress ink.  The ribbon was altered with blue ink.


All the photo mats will hold a 2.5 x 2.75 inch photo and were punched with a 1/2 inch circle punch on the corners to give the appearance of tickets.


Maya Road oblong frames were cut in half, inked and adhered as page tabs.


The little banners were narrow strips glued to a strip of paper.  The end of each strip was punched at an angle with a square punch.

The back cover page has plenty of space for journaling!