Showing posts with label twine. Show all posts

Friday, November 2, 2012

Teresa Collins Christmas Cottage Card

Hello Bloggers!  Up today on the blog is a card made with the TC Christmas Cottage line and some POW! glitter paper provided for my crafting pleasure from The Scrapbooking Studio in Bloomington!


It is a matchbook card with a few layers added in...a Fabrications brad topped off the layered die-cut flower from the line.  It was painted with Tattered Angels Glam in purchased during one of the TA classes held at The Studio last summer!  Fun!

The next layer down is the POW paper.  It is very glittery!  The matting layers were reversed for the "strike" area on the matchbook and it was topped with a stamp from "Just Rite" (CR-03820 Christmas Vintage Labels One) and die cut with a matching die from Spellbinders Antique Labels One.

A closer look at the dimension...


The inside is layered with a gift card pocket and more vintage label dies and stamps and some gems from the TC Fabrications line.


I must say, this was a beautiful line of papers and embellishments to work with!  Thanks TSS!


Sunday, July 1, 2012

CKC Technique Class - 5

Welcome back, bloggers!    The CKC technique today is using rings~paper rings, that is!  The product was from Keller's Creations.  Enough product was provided for a 2-page layout, but I decided it would become a mini-book instead!  It's pretty easy to scrapbook using the little rings!  It goes together very quickly!  This album was constructed in about an hour!

To construct the album, cut two pieces of kraft card stock into four 6 x 12" pieces, score down the center of the long edge and fold. You now have four folded 6 x 6 pieces.  Simply glue the back of each folded piece to the front of the next piece, lining up the edges, folds on the left.  No binding needed!


The only things I added to this, were a few extra buttons and the twine and Mocha Mama Chalk Ink from Quick Quotes.  Plenty of space for those cute photos of my new grand-nephew!

Thanks for stopping by the blog today!  Be Inspired!  Jules

Saturday, March 17, 2012

Little Yellow Bicycle Layouts

 Hello Bloggers!  Post number 2 of 3 for The Scrapbooking Studio/Moline here for you showing some more of the Little Yellow Bicycle and Maya Road product goodness I received to work with this month!  I just love this background page for these engagement photos of my son and now-daughter-in-law!  The page was actually designed around the great elements printed on the paper!
See that title lettering?  It started out as naked chipboard, painted white, then stamped with red Stazon using a flourish stamp.  Pins were added at each end of the title block for some added dimension.
                                                     A detail shot...
 The paper had a stitch pattern printed in white.  The red eyelets and red/white twine made it pop off the page and then I thought it needed "Two Tickets to Paradise" since it was their engagement, after all!
 The edges of the brown photo mats were stamped in Azure Stazon with a flourish stamp and the red and white paisley mat was corner punched for a little elegance...
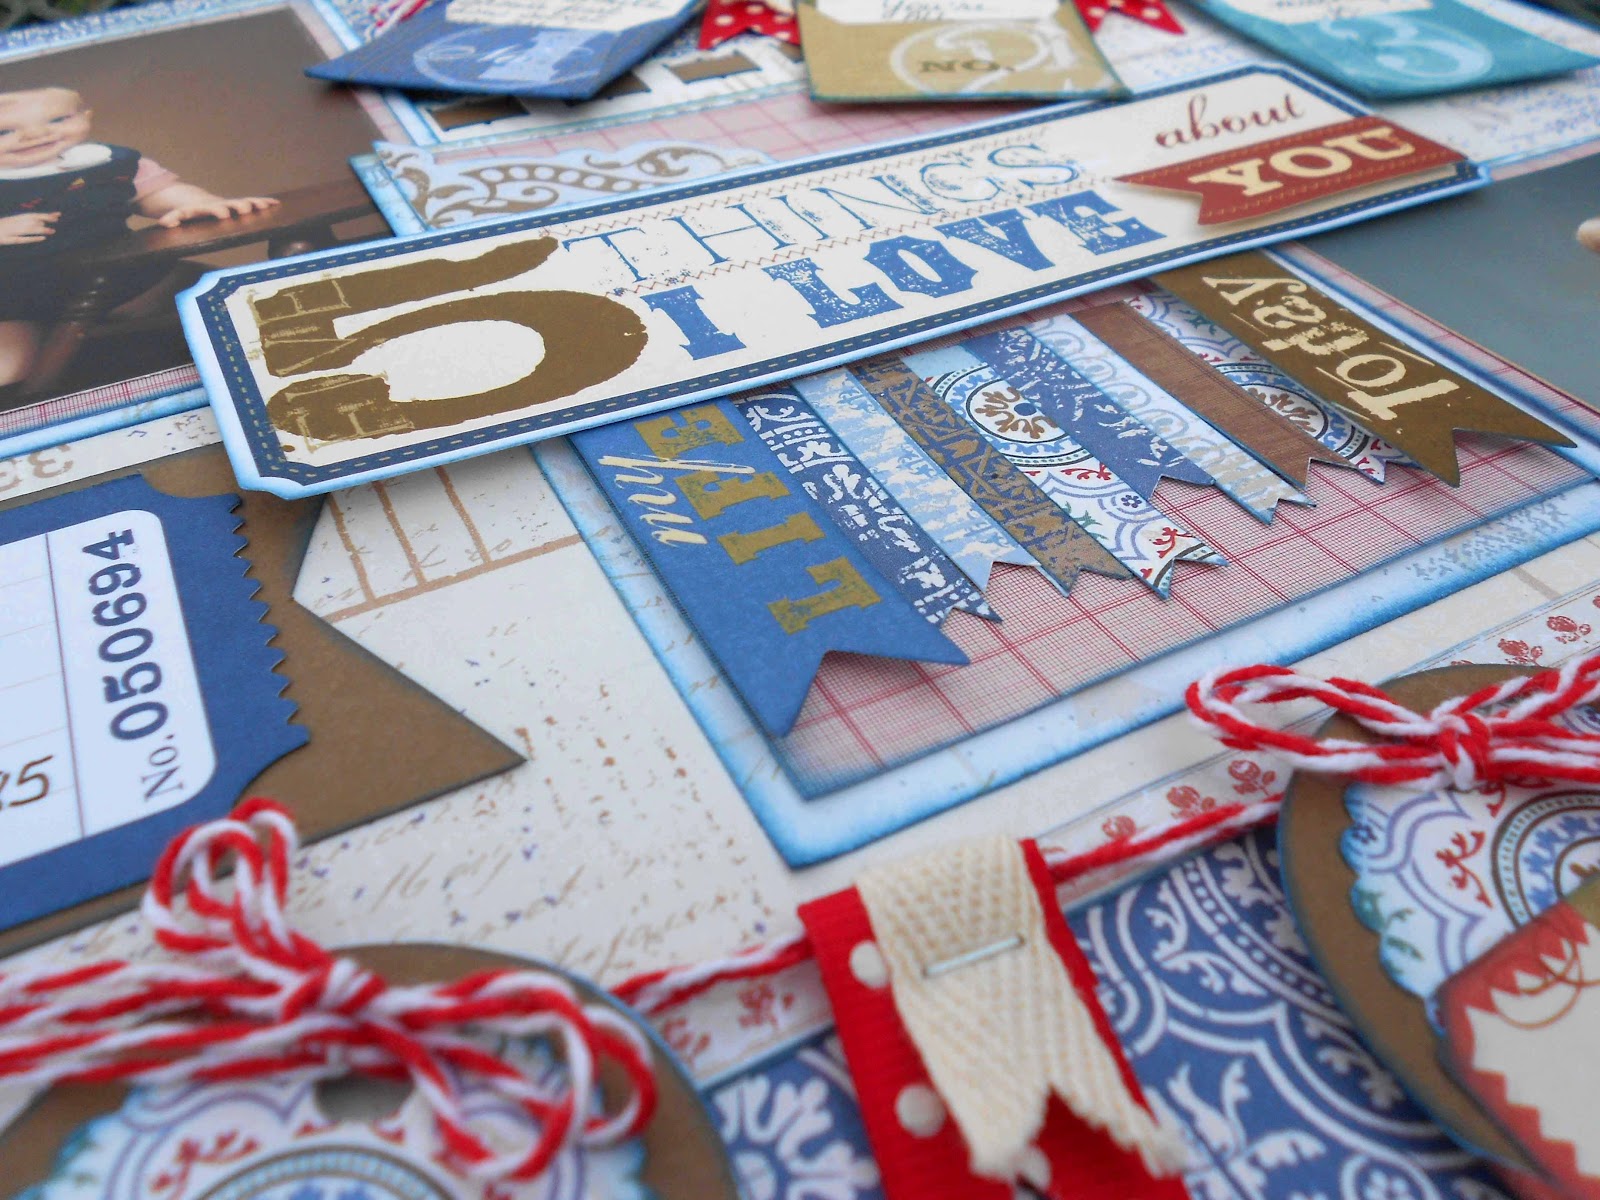
 The next layout was the same son as the layout above, only he was ONE YEAR OLD!   I loved working with the "5 Things" stickers and envelopes ~ they were so much fun and it gave me a great opportunity to express how I feel about him at this age.
 The envelope journaling stickers were just screaming to become a banner, so I figured out a way to make it work on the page.  The insides of the envelopes were plain white, so 1.75" circle and 1.5" scallop circle punches were used to layer brown and patterned papers onto the envelope flaps.  Ribbons were layered and stapled to the banner and added under the mini rosette, which was created with a 3/4" strip, scored every 1/8" then edge punched and inked blue.  The rosette was glued to a larger scallop punched piece and topped with a de-bossed circle sticker.
And lastly, a detail shot of the center treatment.

Thanks for stopping by today!

Be Inspired!  Jules

Wednesday, February 29, 2012

50th Birthday Collage Card

Hello there, bloggers!  Two posts in one day!  Today I am sharing a collaged card for the "special" birthday of a dear friend! 
A piece of Julie j'et aime from Quick Quotes was first layered onto a white 5" x 6.5" card base.  A piece of cream cardstock was then stamped  with a Hero Arts design block stamp called "variety & quality" and embossing ink -then embossed with black embossing powder. 
All the layers were inked Purple Passion QQ chalk ink and possibly some Old Paper Distress Ink.  The "paper bag" flower, was made with this Paper Wishes template from a Scrapbooking Studio product bag and chalked with Very Berry and Purple Passion from Quick Quotes.
The doily was spritzed with some glimmer mist ( sorry, forgot which color combo was used!), with a big 50 die cut, flowers from stash, EK Success layered butterfly punch, buttons, satin ribbon, twine, stick pin, bling brad and a Dress It Up shoe button.  Whew!  What a list!

The 50 was re-purposed from my own 50th and was die cut and stamped by my dear friends at Scrapbook Dreams.  There was alot going on with this card, but my friend loved it, so I'll be incorporating some of the design elements into a special card for my baby sister, who will also be turning a special age in a week or so!

Thanks for stopping by today!  Jules